Wednesday, February 29, 2012

Homemade Wooden Acrylic Stamp Pad


As I have said before I am new to stamping but I know that the acrylic stamps or as I call them "Clear Stamps" are fairly new to the stamping community. The stores are flooded with these more over the traditional rubber stamps. I like these because for a fairly cheap price you can get several different stamps off of one sheet.

I have to admit when I bought my first pack of clear stamps I was a little puzzled at how to stamp with all the stamps on one, however after one test run it didn't take me long to figure out that you are supposed to cut them to separate them. HA HA.

So now I have a baggie full of clear stamps. I do have a few traditional rubber stamps and after trying both I prefer the traditional wood block rubber stamp. I know they have those press blocks for the clear stamps, however I like to see things visually and somehow I feel more organized being able to lay out my stamps to see them.

So as I'm looking at a bag of my sons old wood blocks that he doesn't play with anymore it dawned on me to make my own Wood Stamps.

This is actually very easy.

The first thing you want to do is take your clear stamp and fit it to the size block . this is very important so that your stamp is not larger then your wood block. However it can be the other way around. Your wood block most likely will be larger than your stamp.

Second you take your wood block and trace an outline of the block onto Card stock with a thin pen.


Next you will want to glue your card stock on to your wood block.

Then take the stamp that you are going to glue on to the wood block and stamp the piece of Card stock.
 This way you will know what block is what.

Then wipe off the ink off your stamp to try and keep your hands and area clean.

Then take your glue and cover the flat side of your stamp and adhere it to the wood block.

Set a side to dry.

That's it!! You  can color them in to make them stick out a little more. But really its very easy to make these wooden homemade stamps.


Make sure you click on our giveaway page to enter into our Stamp Week Giveaway Valued at $25.00.


Monday, February 27, 2012

Stamping with Embossing Ink

How many of you stampers LOVE using embossing powder? I do, but have you ever used an embossing pad to resist ink? If you haven't, this post is going to walk you through the steps!

Please bare with me, I sold my good camera to buy a new one (which I had to order) and my older camera doesn't seem to be working. As soon as I can take some pictures, I'll add them to this post!

What you need:
  • glossy card stock (I use photo paper)
  • embossing ink pad (I'm a Stampin' Up girl so I use the VersaMark)
  • rubber brayer 
  • stamp(s)
  • ink pad
  1. Using the embossing ink pad, stamp an image(s) on your glossy paper. The image you choose will be hard to see.
  2. Let it dry (should only take a few moments.)
  3. Completely cover your brayer with ink. Multi-color ink pads also work for this, just make sure you don't mix the colors too much when covering the brayer.
  4. Roll brayer over the glossy paper. The more ink used, the more the stamped images pop but it all depends on the style your looking for. 
  5. Wipe off any excess ink with a paper towel.
I love using this technique for a background!

Hope you enjoyed this simple but fun technique!

Want to know my absolutely favorite technique when I stamp or scrapbook?? Watch for another post from me later in the week to find out!! Full description of how to accomplish this technique will be included in the post!


Until next craft....


Saturday, February 25, 2012

Stamp Week

Stamp Week is Here!

and with it brings another Giveaway!!


The stamping world is blowing up these days and I have to say that I am one that is jumping on the stamping train. There are so many uses for your rubber stamps when decorating. As seen last week with PhotoJewels she used stamping to decorate candles. Then there is scrapbooking, card making, the list can go on. So this week we are going to show you a few things that you can do with your stamps. I know I am excited and the reason being is that stamping is not something I did up in till just recently. So it will be nice to step outside of the box this week and put the fabric down for a bit.

Just recently I did my first ever swap. I did a Valentine's Day Card Swap that was hosted by FaveCrafts. This was the first time I had ever used Stamping in one of my projects. I had so much fun with it.  Now I am hooked. I look forward to doing more card swaps in the future. I wish I had a picture to show, however I totally forgot to get it before I put it in the mail.

So now on to the time you have all been waiting for.This weeks giveaway is for a Mystery Package of assorted stamps. Valued at $25.00 Here are the details on how to enter into this weeks giveaway which starts now and will go through March 2, 2012 at Midnight CST.

There will be a couple ways to enter they go as follows.

1. Follow us on our blog page and then leave a comment below that you are now following us or that you already are a follower of Smalltown Dreamz.

2. On a separate comment below tell us what your favorite thing to do with stamping is or your favorite line of stamps. As longs as it has to do with stamping.

****Bonus Entry**** As we have recently found out is not allowed to make LIKING our Facebook page a requirement we do feel it would benefit you to do so. This way you can get exclusive updates and join in our private games and giveaways that we do on Facebook. 

If you do become a Facebook Follower comeback and leave us a comment that you are now one of our friends and this will get you a bonus entry into the giveaway. 


The winner will be chosen by our Mr. Random and we will announce the winner Saturday Afternoon. I look forward to another great week. 


We have a winner!! and Stamp Week Begins

We have a winner!!!

Mr Random has chosen our winner
 *****Drum Roll Please *****


Comment #14

Congrats to Desiree  "I am following you! "


Thank you for following us and Thank you everyone for your entries. We will be emailing you Desiree to get your mailing information. We hope you enjoy your mystery candle package brought to you by our sponsor Vicky our Independent PartyLite Consultant. 


I would like to give a big thank you to Vicky for Sponsoring this week during Candle Week. If you live in the local area of Washington County Wisconsin and You love PartyLite make sure you give Vicky a message telling her you are interested in either throwing a party or becoming a Independent PartyLite Consultant and tell her we sent you. She is just a FABULOUS Person and well...... who doesn't love PartyLite! If you don't live near her and you just want to buy some of those great smelling candles you can always just hop on to her website and order them right from the site and have them delivered right to your front door. 


 That's what I call a Scent-sational Idea!


 Here is the link to her PartyLite Website 


Bookmark her site and you will have easy access to their great new lines when they come out. I got a sneak peak at their new summer line.  I think I circled half the book in my wish list to the hubby.


Guess what everyone 


we have another giveaway that starts today. Details on this giveaway will be posted this afternoon. This giveaway is in celebration of STAMP WEEK!!!. So pull out those rubber stamps and those ink pads and lets start stamping. 

Stamping is actually something new to me so I am very excited to do this project this week. It will force me to work a little bit out of my element. I know I look forward to seeing what PhotoJewels makes for us this week. Hope to see you all for the giveaway. 

One more thing...Once we get 100 "Facebook Fans" We are holding a small giveaway on our Facebook page to celebrate our appreciation to you our readers.

Thank you again everyone for all your support!

Thursday, February 23, 2012

Tissue Paper Your Candles


This was a similar project to what Photo Jewels had done at the beginning of the week. I enjoy doing this with plain candles because then I can personalize them to my own liking. All I did for this was take a cheap plain white candle that I picked up at Wal-Mart took some plain red tissue paper that I had left over from Christmas and used my heat gun from my old painting days.

This was actually a candle that I had done for Valentines Day but with candle week coming up I waited to post till now. So this was really easy to do and pretty quick. I cut out a couple hearts from the red tissue paper. I cut them free-handed so there would be a slight difference between the candle.

 After I cut out my hearts I took a couple drops of water and slightly dampened the back of the tissue paper so it would stick on to the candle until i could get the heat on it. After I positioned the heart on the candle I took my heat gun and on the lowest setting possible. I have a heavy duty heat gun which is a little more intense then the one i should have for this project. I learned that you should just quickly fan over over it slightly then pull away for a min so that the candle doesn't bubble up. Do this a few times until your tissue paper is fully covered by wax.

I think this makes for a great effect on decorating candles. You can use spice leaves for your kitchen candles. This is something I will do for Husband once his fresh spices grow in.

 Another thing you can do to decorate your candles if you don't plan on burning them is to use glitter. If you are like me and love alot of sparkly and things that are a little on the blingy side this is a cute idea.

Just recently I found a candle that had a really long wick on it and thought it was kinda nifty. This candle with out burning it has a strong aroma and so decided for the time being to keep it the way it is. I had found one of these bead pieces and tied it on their as to add just a touch of decoration. I think it looks nice.


 Remember tomorrow is the last day you can sign up for the Mystery Candle Giveaway. Click on the link below will take you to the giveaway page to get the details on how to enter.


Saturday, February 18, 2012

Candle Giveaway

It's Time!!!

We are very happy to announce that we are launching our first giveaway here at Smalltown Dreamz. In celebration of our move to Blogger we will be having giveaways for the next 4 weeks. Along with the giveaways you will see some great tutorials done by the writers at Smalltown Dreamz and some featured tutorials by some our blogging friends.

This week is Candle Week and my new Co-Writer Photo Jewels kicked it off by writing a great tutorial on how to Jazz up those plain colored candles. Here is a quick link.

So now on to the Giveaway  Entry Details. 


Our Newest sponsor is helping us give away a Mystery Candle Gift Package (Valued at $25.00)  
 - Independent PartyLite Consultant - Victoria Miller - you can find her personal site at www.partylite.biz/vickymiller So hop on over to her site and check things out. 


There will be 2 ways to enter with 1 bonus entry. 

1. Become a follower of Smalltown Dreamz on our Blog site and leave a comment that you are or have been following us. 
2. Go over to Vicky's site and look to see what PartyLite has going on come back and leave us a comment with what your favorite scent is. 


****Bonus Entry**** As we have recently found out is not allowed to make LIKING our Facebook page a requirement we do feel it would benefit you to do so. This way you can get exclusive updates and join in our private games and giveaways that we do on Facebook. 

If you do become a Facebook Follower comeback and leave us a comment that you are now one of our friends and this will get you a bonus entry into the giveaway. 

This giveaway will go till Friday 2/24/2012 at Midnight Central Standard Time and the winner will be announced here on the blog on Saturday Afternoon. The winner will be chosen by Mr. Random. 

I have to say that I spent the morning with Vicky at her regional meeting for PartyLite and I got a sneak peak at the new summer line. I have a long wish list after today.  It was such a fun event to go to with some very awesome people. I can't give any details about the new line, however I know that you are all going to love what they have coming out. 


Candle Burning

This is an amazing project but requires practice and patience, as you can easily melt the candle while trying to add an image, or make it bubble just as I did!
What you need
  • candle
  • tissue paper
  • heat tool
  • ink/stamping markers
  • stamps of any kind
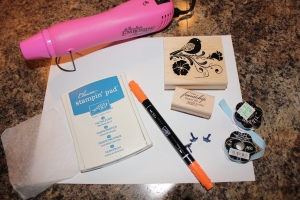
  • embellishments such as brads, ribbon, fabric flowers (or crochet)


First, stamp your preferred image on the tissue paper on the SHINY SIDE using ink pads or stamping markers. When using multiple colors of markers on stamp, "huff" it when completely covered with ink. ("Huffing" is a stamping term meaning you'll be breathing as hot of breath on the stamp to moisturize it.)


Second, cut out stamped images as close as possible to edges.


Third, using heat tool CAREFULLY heat image on candle. As it heats, you will notice is starting to melt into the candle. If you heal it too much, the candle will bubble and melt too much, just as the picture to the right did. Hold the heat tool approximately 12 inches back but continuously heat the image. It may take several minutes.

Fourth, add any embellishments once all your stamped images are in place.

PLEASE NOTE: IF USING ANYTHING BURNABLE, IT MUST BE REMOVED BEFORE BURNING THE CANDLE!!


My blue candle didn't turn out. As you can see by the picture, the wax paper didn't melt completely into the candle and, its hard to tell by the picture but I burned the word 'sparkle' too much and it misshaped the candle.


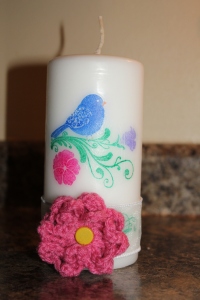
Front of candle


Back of candle


As I love to crochet, I added a crocheted flower but you can add fabric flowers as well.

This project is great for wedding favors by purchasing a personalized stamp with names and date stamped on a smaller candle!


Hope you enjoyed this project and find it as fun as I did to do!


Until next craft...


Candle Week

Welcome Everyone 
We are Officially Home!!

We will be celebrating our move with 4 weeks of giveaways and great crafting ideas.

Week 1 - Candle Week 2/18/2012-2/24/2012
Week 2 - Stamping Week 2/25/2012-3/2/2012
Week 3 - Yarn Week 3/3/2012-3/9/2012
Week 4 - Fabric Week 3/10/2012-3/16/2012


This week is Candle Week!!


We will have a giveaway that will be kicking off this afternoon here on the blog. Entry details will be announced this afternoon. Our sponsor is helping us give away a Mystery Candle Gift Package (Valued at $25.00) from our - Independent PartyLite Consultant - Victoria Miller - you can find her personal site at www.partylite.biz/vickymiller So hop on over to her site and check things out. 


I will be spending my morning with Vicky looking at the new summer line. I can't wait to be her guest and take a look at what PartyLite is all about. I know I love their lines so this will be an exciting day for me. When we get back today I will post the details about my day with Vicky and then give the details on this great giveaway that we have going on. 

Have a great morning and look for details later today on how to enter into the giveaway.


P.S. To kick off candle week today our new writer Photo Jewels is going to have a great candle crafting idea on how to dazzle up those plain colored candles. You will be amazed at what you can do with a plain colored candle. 

Friday, February 17, 2012

Late Night Indulgence


YUMMY!!!


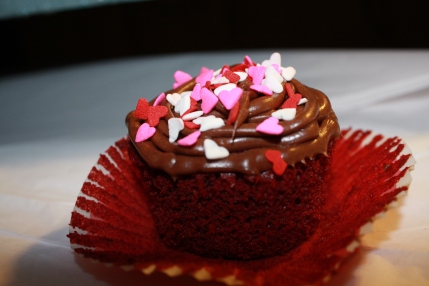
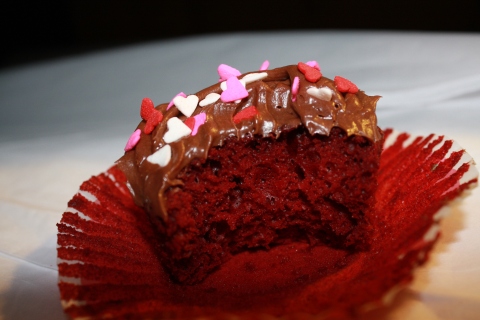
I had to share!! Today my husband made these delicious red velvet cupcakes with chocolate frosting and little heart sprinkles for me and our son for Valentine’s Day. These are the most moist cupcakes I think I have ever eaten. He made these early this morning and it is now nearly 24 hours later and they are still so moist and yummy. Are you like me sneaking into the kitchen in the middle of the night looking for something to snack on. What leftover Valentine’s day treats are you eating? Well Like I said I just wanted to share because they looked so cute and they just tasted so wonderful. Just if you are wondering this was made with the Betty Crocker red velvet cake mix and chocolate frosting is also Betty Crocker and just added and extra teaspoon of oil.

Well have a good night and remember to check in this week for a major announcement. I am really excited about this and its just the begining of great things to come.

Bead Bling!

Hi everyone! I wanted to share this craft with you. I did it a while ago and made a set for myself as well as each of my children's grandparents for their frig and everyone loved them!!
This is a quick fun craft that is great for a gift. Pictures can be used but also paper, designs, drawings.... there are so many possibilities!!
Image
Items you need
What you need...
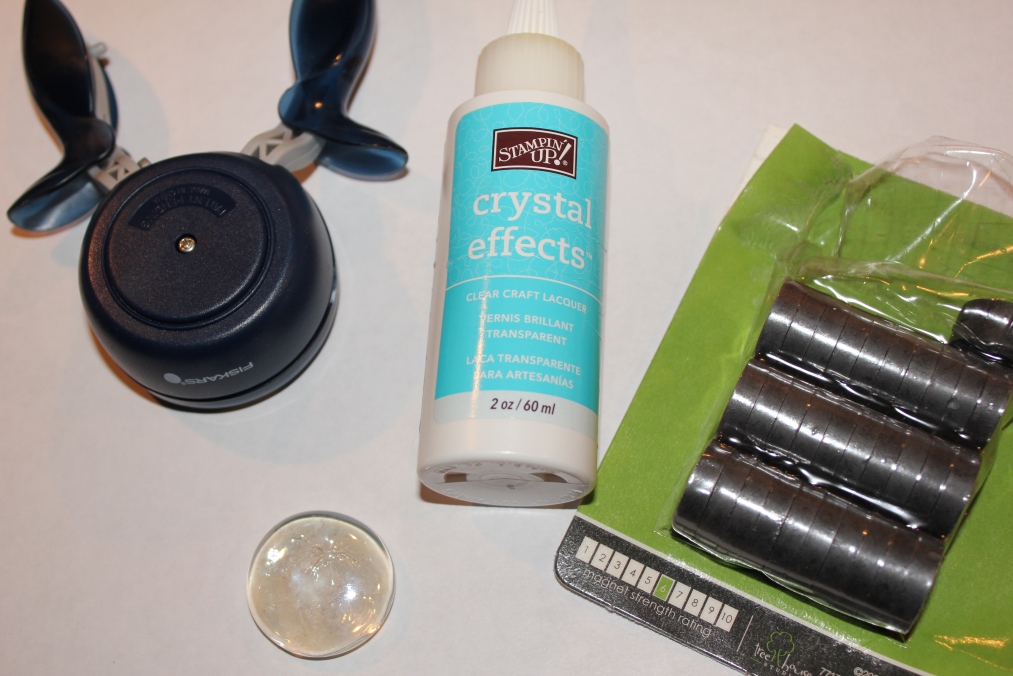
  • 1 1/4 inch flat clear circular beads (I bought mine from Hobby Lobby in the wedding section.)
  • any clear all purpose glue (Crystal Effects from Stampin' Up works great. The glue will make the picture more visible when it actually adheres to the gem.)
  • 1 1/4 inch circular punch
  • magnets (I used magnet 6 strength~ it was strong enough to hold paper on the a frig but is on the thicker side. You can also use cut sheets of magnetic paper but it won't be able to hold anything.)
  • Pictures/paper/design or anything you want to show threw the bead
First, use your circular punch to punch out the image you want to add to the bead. (A great tip I learned in stamping class is to always punch backwards so you can see your image as you punch it! It sure helps people like me that can't keep things straight!)
Second, put a SMALL amount of Crystal Effects on FRONT of picture (or any other clear glue that you may find to work.)
Third, firmly press image on back side of clear bead and hold for several seconds. It's best to let it dry completely before next step.
Fourth, put a small amount of Crystal Effect on BACK side of picture.
Next, press magnet where you just placed glue and hold firmly for several second. Let dry overnight. (Keep checking bead as they may start to slip before glue is dry completely, you may have to recenter.)
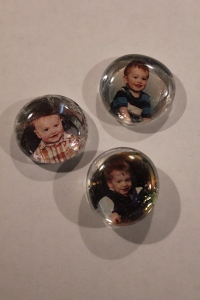
The picture below is what I made for myself and the kids' grandparents...
The picture below is what I made in a stamping class the first time ever doing this craft and it was actually just a small part of bigger project... maybe one day I'll post the entire thing! The background is just paper punched out!
 Hope you enjoyed this!
Until next craft...

Delighted!

 
Hi everyone! I am completely delighted to have this opportunity to reach out to so many people and share crafts, as well as working with Stephanie in brainstorming and giving you great projects ideas! Because I am so delighted to be here, I thought it would be fitting to give you one of my favorite delights...
Oreo Torte Delight

1 pkg Oreos crushed (save 1 cup for topping)
1/2 cup (1 stick) butter, melted
8 oz cream cheese
1 cup powder sugar
16 oz cool whip
5.9 oz box instant chocolate pudding
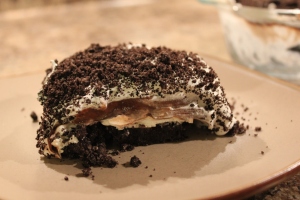
Make crust by mixing all but one cup crushed Oreos and 1 stick of melted butter and pressing into a 9x13 pan. Combine softened cream cheese, 8 oz cool whip, powder sugar and blend well. Smooth over crust. Make instant chocolate pudding according to directions on package. Smooth over cream cheese mixture. Take remaining 8 oz cool whip and spread over top of pudding. Garnish with crushed Oreos. Refrigerate several hours or overnight before serving.
YUMMY!! A bit messy and very sinful, next time I'll have a healthier recipe!
By the way, February is 'Bake for Family Fun Month'  and even though this recipe isn't baked, I hope you enjoy this as much as I do!!

Until next craft…

Getting Side Tracked


Getting Sidetracked


So yesterday with our sudden small blizzard I had the full intention of going in strong with trying to get as much done on my baby owl quilt as possible and actually I think I did get pretty far. That will be updated in a post next week when I share it for the WIP Wednesday over at Freshly Pieced.
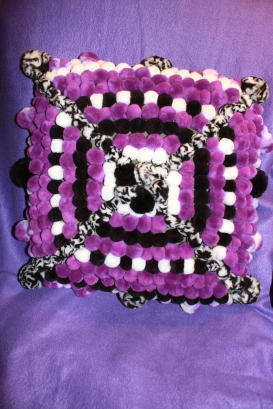
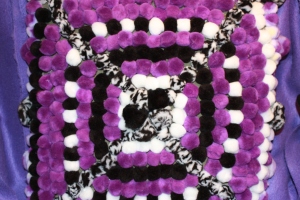
Anyway just as I seemed to be cruising along on the quilt I stopped to get something out of the drawer when I looked up and saw my brand new shipment of pom poms staring me in the face and they started calling to me. Wouldnt you know with in 5 min I had my sewing machine and fabric moved and out-of-the-way and 1000 pom poms staring me in the face. There were so many colors and sizes, Honestly I was a little overwhelmed for about 2 min trying to figure out what I was going to do with all these poms. Seeing how I won these in an auction for free on Listia and free shipping to boot this was definitely one of my better so-called “Savings” when it comes to keeping the budget down. After sorting through all the colors and of course separating them into their own colored bags I took my favorite color and then the obvious contrasting colors of black and white, pulled out the hot glue gun grabbed an old throw pillow that needed some restoration and got to work.
I used some of my purple fleece fabric to finish it off in the back. I think its cute. If I would have known then what I know now then I would have covered the whole pillow in the fleece before glueing on the Poms. There are a couple of spots that I am going to go back and fill in where the old ugly green fabric is showing through. Also I probably would not use the bigger ones on the edge. The picture in my head didn’t exactly turn out in real life.
I measured the Fleece to the size of the pillow knowing that it had a bit of stretch in it so that it could be pulled tight. I took the edge of the fleece and hot glued it to the edge of the last row of Poms securing it just underneath so the poms would stick over a bit hiding the fleece edge as much as possible.
So this is what happens when I get sidetracked. I finish other projects and not the one intended. Has this happened to you? I am sure it happens to everyone. I wouldn’t necessarily say it’s always a bad thing. I say as you are not getting sidetracked when it comes to the important things then its ok in my book. Well I look forward to sharing what I did get finished with the Owl Quilt, maybe I can sneak a few more hours in and get the baby almost done by Wednesday.
Happy Crafting from my home to yours

Upcycled Bottle


Yarn Art as I like to call it.


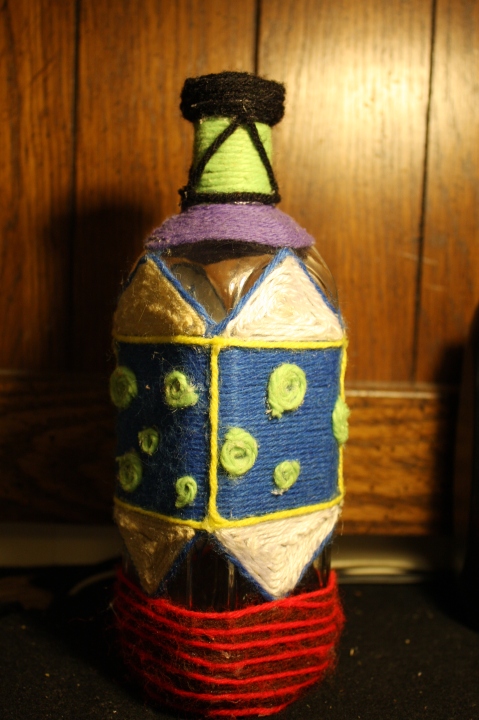
This was a piece that I did a while back that I would like to share with everyone. This was an old bottle we had lying around and it was just something that really did not look very attractive. I am not saying that this made it look anymore attractive, but I like to think that it’s at least an improvement. I used a bunch of left over yarn shrivels to decorate this and used hot glue to secure it on to the bottle. This project was pretty fun but I suggest some sort of finger guard to protect from the not glue. My poor finger tips were pretty tore up after completion.
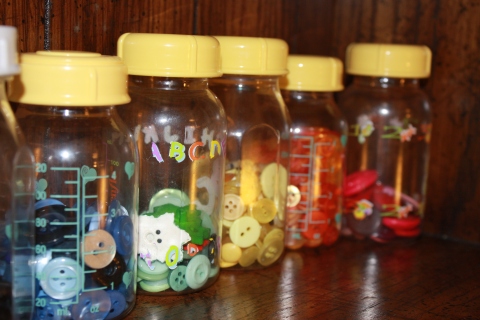
I really love to upcycle old stuff, or reuse something. As a mom on a budget I like to save money where ever I can. Here is another Upcycled idea I did with my little boys old baby bottles.
I am a color fanatic so almost everything I own is color coded. All my sewing thread is color coded by hue.


Well I am glad that I shared some of these ideas with you. I know I am not the first to think of either of these ideas but never the less I always like to share. Soon I will be decorating the covers to all my containers. I will update these and share how they look after their sweet little makeover.

Make sure you take a look below to see some of the upcoming projects that I will be finishing or working on in the near future.


Happy Crafting


Up coming projects…….

Looking Forward.....

As I sit here and dust off the cobwebs to my tiny ghost town of a blog, I am excited to make a fresh start and slowly get back to what...