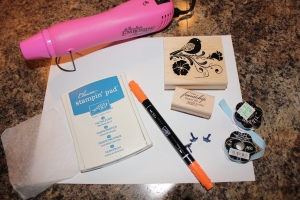
What you need
- candle
- tissue paper
- heat tool
- ink/stamping markers
- stamps of any kind
- embellishments such as brads, ribbon, fabric flowers (or crochet)

 First,
stamp your preferred image on the tissue paper on the SHINY SIDE using
ink pads or stamping markers. When using multiple colors of markers on
stamp, "huff" it when completely covered with ink. ("Huffing" is a
stamping term meaning you'll be breathing as hot of breath on the stamp
to moisturize it.)
Second, cut out stamped images as close as possible to edges.
 Third, using heat tool CAREFULLY heat image on candle.
As it heats, you will notice is starting to melt into the candle. If
you heal it too much, the candle will bubble and melt too much, just as
the picture to the right did. Hold the heat tool approximately 12 inches
back but continuously heat the image. It may take several minutes.
Third, using heat tool CAREFULLY heat image on candle.
As it heats, you will notice is starting to melt into the candle. If
you heal it too much, the candle will bubble and melt too much, just as
the picture to the right did. Hold the heat tool approximately 12 inches
back but continuously heat the image. It may take several minutes.Fourth, add any embellishments once all your stamped images are in place.
PLEASE NOTE: IF USING ANYTHING BURNABLE, IT MUST BE REMOVED BEFORE BURNING THE CANDLE!!
My
blue candle didn't turn out. As you can see by the picture, the wax
paper didn't melt completely into the candle and, its hard to tell by
the picture but I burned the word 'sparkle' too much and it misshaped
the candle.
 | ||||
| Front of candle |
 |
| Back of candle |
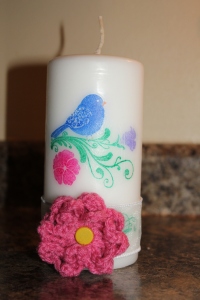
As I love to crochet, I added a crocheted flower but you can add fabric flowers as well.
This project is great for wedding favors by purchasing a personalized stamp with names and date stamped on a smaller candle!
Hope you enjoyed this project and find it as fun as I did to do!


No comments:
Post a Comment
Thank you for taking the time to comment