Showing posts with label craft. Show all posts

Sunday, May 6, 2012

Another Mario Pattern

Well I finished another mario pattern. I love the little mario mushrooms so it was only fitting to remake this and do my own pattern for it. This little mushroom was very easy to make. My family has asked me to continue and make the rest of the mario characters for them. So in between all my other projects I will sneak in some time to work on the rest of the characters.

 My mom fell in love with this little guy and has asked me to make her one so that she can travel with it on her vacations and she is going to take pictures of the mini mushroom on her ventures. I will share her photos from her traveling mini mushroom adventures as they go. I think its a nifty little idea that I might just have to do with my lil guy on our adventures.

Well anyway the pattern for this guy will go into testing this week and as soon as I get it back the pattern will be available in my ETSY Shop. If you are a follower and saw the bomb-omb post last week. That guy is supposed to be out of testing this week and the pattern will be posted in my shop following a good review from the testers.

On another note I am looking for more crochet testers for patterns that I will have coming up if you are interested please email me or contact me on my Facebook page for more information.


Happy Crafting!!


Wednesday, May 2, 2012

Sewing a crochet hook holder


 Sewing a crochet hook holder....


So recently I have been trying out making some smaller items with the sewing machine. I decided that I needed a holder for all my crochet hooks. I started looking through my small little stash of fabric and realized I just loved this black and white butterfly print.

 I played around with a few test pieces until I figured out how I wanted to design it. I made a couple as gifts for a few of my crochet friends as well. This was a great way to practice my strait lines, which proved to be alot harder than anticipated.

I also attempted at using the monogramming stitching on the sewing machine. That is pretty interesting but I think there are so many more possibilities when you hand stitch the lettering onto something.

I think it would be nice to make a couple more and put them up for sale in my ETSY shop. I had another friend that said they would make a great makeup brush carrier. So that is on my next todo list. I am going to make her one since she like the idea. She is coming up for a visit with her brand new baby and I have to say I am super excited to get me some baby and much needed quality friend time in.

Anyway I also did this one in a cute lady bug fabric. I can only show you part of it as I have decided to gift this one. lol.


Happy Crafting


PS just a reminder that we will be collecting blankets untill Nov 15 for the Blanket drive for the Children at Children's Hospital for more information click on the link here. Thank you to everyone who have supported us through this.


Sunday, March 25, 2012

Dressing up a Container

First I would like to say how sorry I am about the lateness of my posts these past few weeks. I was sick for a while there and then the hubby surprised me with a mini vaca to just get away for a couple days and relax. Wouldn't you know I left my laptop on the counter when we left and didn't realize it till 200 miles later. So I will be posting my projects the remainder of the week. I hope you enjoy.


My first project I dressed up a nestle quick container that stores my pens. This is a very fast and easy no sew project. I love containers, and I have containers to hold just about everything. Just recently I have started dressing up my containers so that they have a little more style.

I am also a big fan of pens and markers and have just about every color of sharpie and gel pen. Anyway so what I did for my pen container was take some plain white fabric, some brown ribbon, and some teal glitter. Ohh and some glue!

First I layed a line of glue down and placed the fabric right over the line.


Each time I rounded a side on the short sides I would lay a line of glue down to secure the fabric to the container

 Then I wrapped the fabric around the container enough times so that you don't see any writing. If you are using a clear container you won't need as much fabric.

After I layed my fabric down then I glued down the brown ribbon.


Next I glued the rim of the container then layed some glitter over it to just give it a little bling..

Last I labeled the container. I will eventually add some extra details as I come across them.

What do you do with your empty containers?

Happy Crafting!
P.S.  REMEMBER we have a Giveaway going on right now for a free fabric charm pack. Make sure you click on the link below to get the details on how to enter.


Saturday, March 17, 2012

Fabric Week

I know that I am about a week late on posting fabric week and to our fans I am so sorry. Both PhotoJewels's house and my own have been dealing with some nasty cold and flu viruses. So Now that we are cleared up for the most part I know have some extra time to get things back in order.


So now on to the important things.........

FABRIC WEEK!!!

This one is my favorite. So their for I will be personally sponsoring this one. This week we will be giving away some of my favorite fabrics in a charm pack. I love quilting and its always good to have an extra stash here and there.


I can't wait to show you some of the neat projects I have in store for you this week.

Here are the details on how to enter

1. Follow us on our blog page and then leave a comment below that you are now following us or that you already are a follower of Smalltown Dreamz.

2. Tell us what is your favorite fabric craft is. It doesn't always have to be sewing or quilting.  

****Bonus Entry**** As we have recently found out is not allowed to make LIKING our Facebook page a requirement we do feel it would benefit you to do so. This way you can get exclusive updates and join in our private games and giveaways that we do on Facebook. 

If you do become a Facebook Follower comeback and leave us a comment that you are now one of our friends and this will get you a bonus entry into the giveaway. 


The winner will be chosen by our Mr. Random and we will announce the winner Saturday Afternoon 3/31/12.
 I look forward to another great week. 


          P.S. Happy St. Patties Day

Monday, March 5, 2012

Yarn Dream Catcher

Its yarn week!!! And my favorite week since crochet is my favorite craft-type hobby!! Crochet is my way to relax! Almost every night before bed, I work on at least two rows of whatever project I'm working on. If your like me and LOVE to work with yarn, please check out the post below or click here to find out how to win a great yarn-related mystery package!

Unfortunately, since I LOVE to crochet, I don't do much with yarn besides crocheting. I did a search to find more yarn projects and came across a great site and found one that I thought adults and kids alike would like to do!

Its a Yarn Dream Catcher can the instructions can be found here.

Hope all of you enjoy yarn week as much as I will! And don't forget to check out the giveaway!!!

Until next craft...


Thursday, March 1, 2012

Local Shout-Out!!

In light of Stamp Week I was tooling around on Facebook and came across a great Facebook Shop Page for Homemade Cards, Bookmarks and other great items. Seeing how this is about as far as I have dipped my toes into the stamping world. I was truly amazed with this young girls talent. Kayla is just starting out into the blogging world and I wanted to give her a shout out. She is one of our local crafters and I always try to give our local community some much needed love.

If you get a chance go on and check out everything that Kayla has to offer. You can find her stuff for sale on Facebook and you can get there by clicking on her logo or by clicking here. You can also check out her blog page here at http://kaylas-kreations.blogspot.com/.


 Here are some other cool items she has in her shop. You all know I have a soft spot for owls. Ha Ha!


Remember we have a Mystery Stamp Giveaway (Valued at $25.00) going on here this week. Click here or on the Giveaway Button found on the sidebar to get the details on how to enter.

As always Happy Crafting!!


Saturday, February 18, 2012

Candle Giveaway

It's Time!!!

We are very happy to announce that we are launching our first giveaway here at Smalltown Dreamz. In celebration of our move to Blogger we will be having giveaways for the next 4 weeks. Along with the giveaways you will see some great tutorials done by the writers at Smalltown Dreamz and some featured tutorials by some our blogging friends.

This week is Candle Week and my new Co-Writer Photo Jewels kicked it off by writing a great tutorial on how to Jazz up those plain colored candles. Here is a quick link.

So now on to the Giveaway  Entry Details. 


Our Newest sponsor is helping us give away a Mystery Candle Gift Package (Valued at $25.00)  
 - Independent PartyLite Consultant - Victoria Miller - you can find her personal site at www.partylite.biz/vickymiller So hop on over to her site and check things out. 


There will be 2 ways to enter with 1 bonus entry. 

1. Become a follower of Smalltown Dreamz on our Blog site and leave a comment that you are or have been following us. 
2. Go over to Vicky's site and look to see what PartyLite has going on come back and leave us a comment with what your favorite scent is. 


****Bonus Entry**** As we have recently found out is not allowed to make LIKING our Facebook page a requirement we do feel it would benefit you to do so. This way you can get exclusive updates and join in our private games and giveaways that we do on Facebook. 

If you do become a Facebook Follower comeback and leave us a comment that you are now one of our friends and this will get you a bonus entry into the giveaway. 

This giveaway will go till Friday 2/24/2012 at Midnight Central Standard Time and the winner will be announced here on the blog on Saturday Afternoon. The winner will be chosen by Mr. Random. 

I have to say that I spent the morning with Vicky at her regional meeting for PartyLite and I got a sneak peak at the new summer line. I have a long wish list after today.  It was such a fun event to go to with some very awesome people. I can't give any details about the new line, however I know that you are all going to love what they have coming out. 


Candle Burning

This is an amazing project but requires practice and patience, as you can easily melt the candle while trying to add an image, or make it bubble just as I did!
What you need
  • candle
  • tissue paper
  • heat tool
  • ink/stamping markers
  • stamps of any kind
  • embellishments such as brads, ribbon, fabric flowers (or crochet)


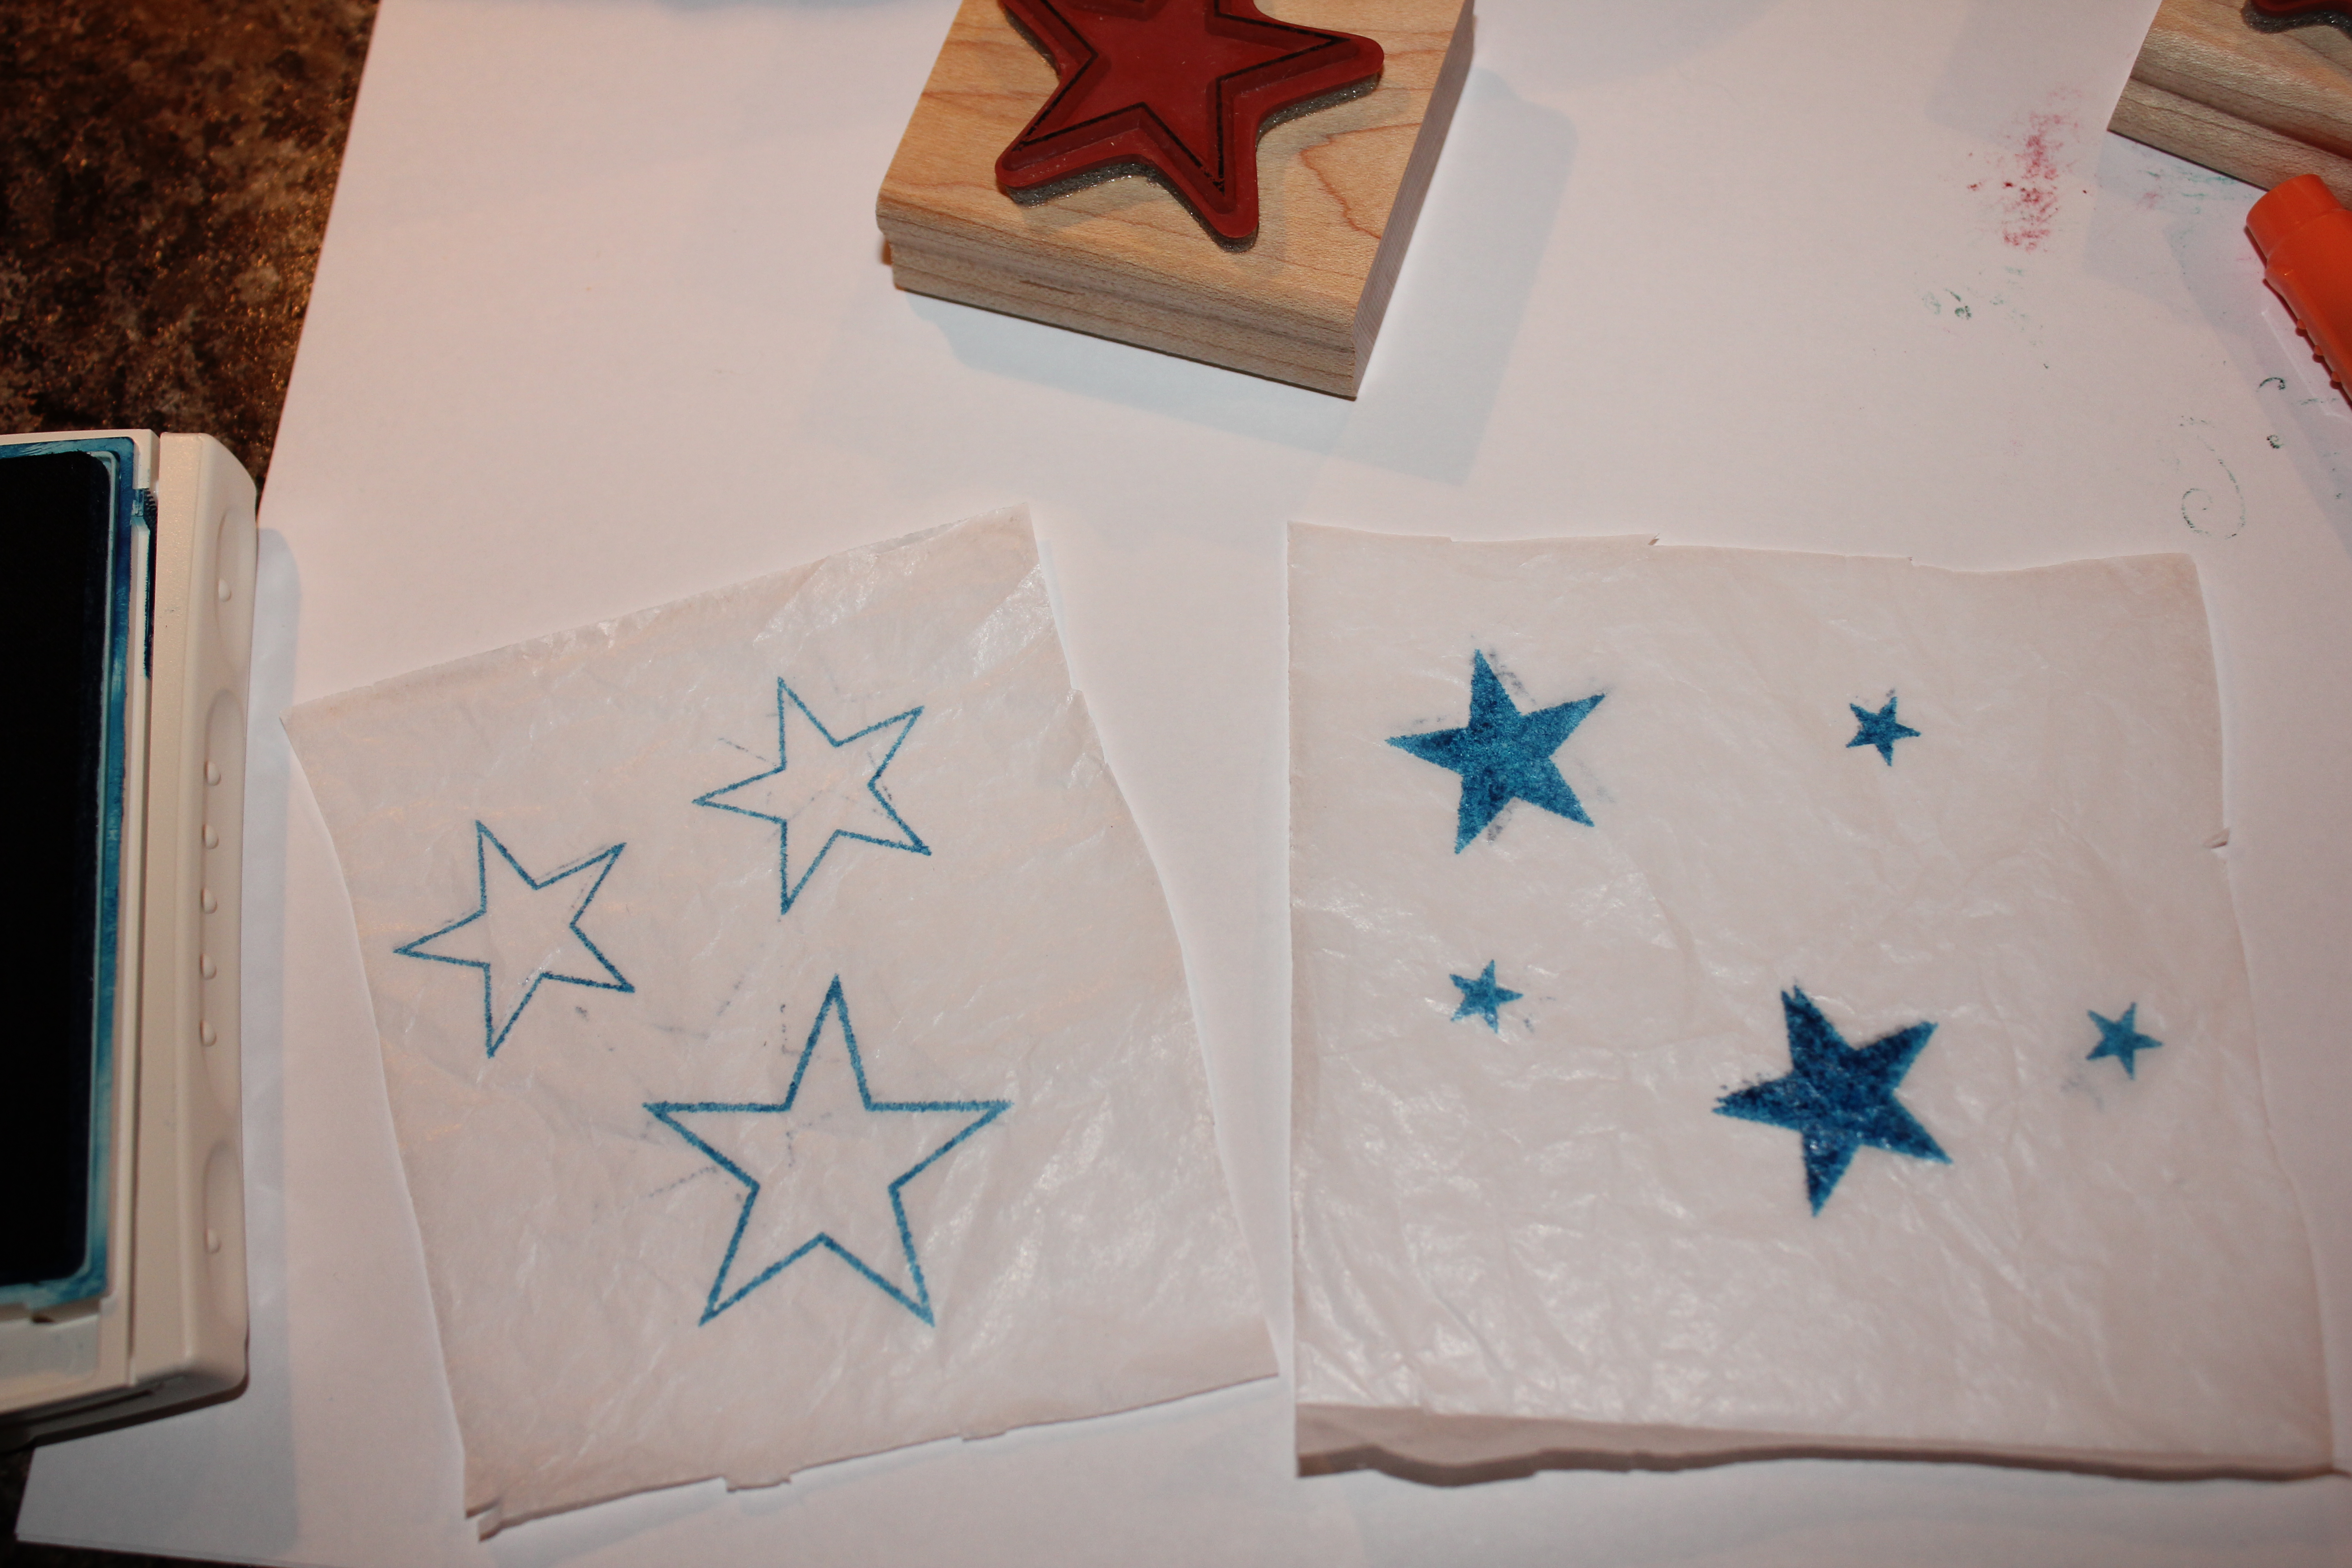
First, stamp your preferred image on the tissue paper on the SHINY SIDE using ink pads or stamping markers. When using multiple colors of markers on stamp, "huff" it when completely covered with ink. ("Huffing" is a stamping term meaning you'll be breathing as hot of breath on the stamp to moisturize it.)


Second, cut out stamped images as close as possible to edges.


Third, using heat tool CAREFULLY heat image on candle. As it heats, you will notice is starting to melt into the candle. If you heal it too much, the candle will bubble and melt too much, just as the picture to the right did. Hold the heat tool approximately 12 inches back but continuously heat the image. It may take several minutes.

Fourth, add any embellishments once all your stamped images are in place.

PLEASE NOTE: IF USING ANYTHING BURNABLE, IT MUST BE REMOVED BEFORE BURNING THE CANDLE!!


My blue candle didn't turn out. As you can see by the picture, the wax paper didn't melt completely into the candle and, its hard to tell by the picture but I burned the word 'sparkle' too much and it misshaped the candle.


Front of candle


Back of candle


As I love to crochet, I added a crocheted flower but you can add fabric flowers as well.

This project is great for wedding favors by purchasing a personalized stamp with names and date stamped on a smaller candle!


Hope you enjoyed this project and find it as fun as I did to do!


Until next craft...


Looking Forward.....

As I sit here and dust off the cobwebs to my tiny ghost town of a blog, I am excited to make a fresh start and slowly get back to what...