Friday, February 17, 2012

A Work In Progress


My First Quilt Cont…..


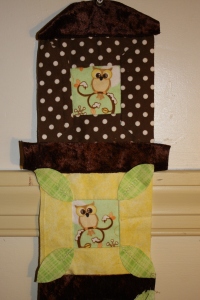
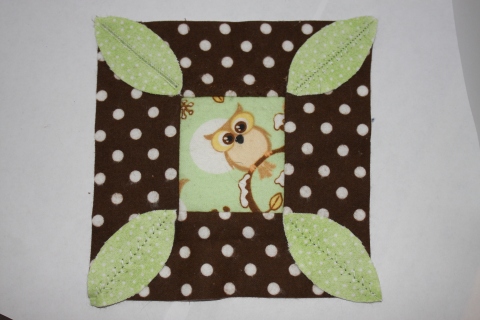
Well this is definitely my work in progress and after some minor surgery on it lol I think I can get back on to the roll of things. I am new to the sewing and quilting world so I knew when I jumped into making a quilt for my 2 project that I was going to come across some issues. I have since figured out my mistake and can’t wait to keep going on this one. I really like the way this is starting to come together. I am unsure of how I will actually quilt this in terms of quilting design. If anyone has any suggestions please I would love to hear them. hopefully I will have this finished by the end of the month.

Happy Quilting

Pom-Pom Tree for Valentine’s Day


Tree of Love

Fun Valentine’s Project for you and the kids

Week 4 of the 5 Weeks of Love Challenge


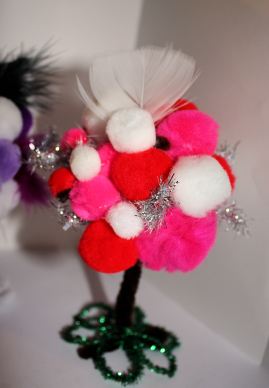
I saw an idea like this as I was searching for a something else and can not find where I saved the website name. So if by chance anyone knows who just recently did a tutorial for something like this let me know and I will be sure to put their name on here as an inspiration to how this project came to light. This was a lot of fun to work on with my little one. We played a counting game while we were holding the pom- poms on to set.
I wasn’t really sure how this was going to turn out but I wanted to give it a try anyway. I added the feathers for some extra flair and texture.
Honestly I think the hardest part was getting the support at the bottom just right to support the top.
The materials I used were
  • Pom-Poms
  • Chinelle Fuzzy Sticks
  • Glue
  • Feathers

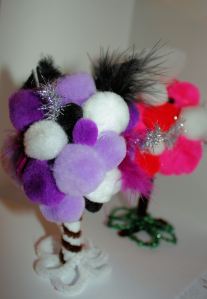
These look really cute in the window cill or the table as Valentine’s Day Decorations. I made a purple one for myself. I thought it was one of those things that would look nice on a shelf in my crafting area.
Happy February!!!

My First Quilt Square


Thats right, its official I have a new love. QUILTING!!!!!! I had picked up a Fat Quarter Bundle at Wal-Mart the day after Christmas. Seeing how I just LOVE Owl Print, I knew exactly what I wanted it for. I just had to learn how to cut fabric and sew. After weeks of practicing on some old shirts I had cut up, I decided to try out my new skills and attempt to make my first quilting square.
I just love this fabric and I found an online store that was selling it, however I believe that they stopped carrying it. Here is the site link if you wanted to see more fabric of hers.
The site is called Diaper Fabric Fanatic
DFF logo
One more thing….. I’m going to be linking to Quilt Story, see the sidebar for their Fabric Tuesday Button!!! Take a peek. There are other fabulous projects to see too. You will also be able find this on Red Pepper Quilts the Patchwork and Quilting Blog List.
Happy Quilting!!

Homemade "Baby Bottle" Pin Cushion


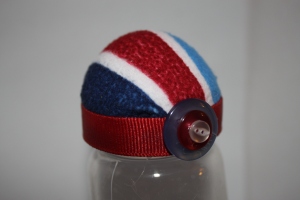
I am big on upcycling so it was only right that when we were done having our child and knew that we couldn’t have more I decided to use the left over bottles for storage. These are great for storing , buttons, beads, pins, small embellishments, the list can go on and on. The other night I was looking at all the left over bottles and started filling them with all my odds and ends. I wanted to share this one because last week I had posted about upscaling your tomatoes and wanted to share that you don’t have to have a tomato to store your unused sewing pins.

I really like the way this one turned out.

The supplies I used were:
  • Hot Glue
  • 1 Large Chenille pom poms
  • 1 Baby Bottle
  • 1 4×4 in square fabric
  • 1 6 in piece of ribbon

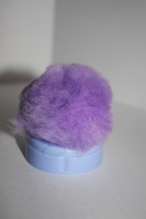
First I glued the Pom Pom onto the bottle cover.

Then I took the fabric and glued it over the pom-pom to the bottom edge of the bottle cover.
Next cut off your access fabric so that its flush with the bottom of the cover.
Then take your ribbon and glue it around the bottom for a little decoration and to hide anything from the fabric after being cut.

What do you use to store your odds and ends?


Happy Sewing!!

A Pin Cushion Makeover


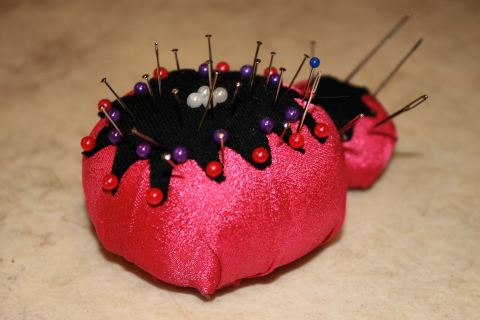
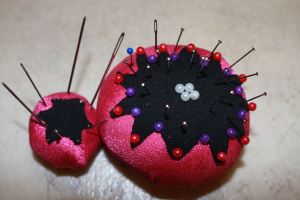
If you are like me I love to customize things to my liking. So when I got all my sewing supplies, I knew the little red tomato would not stay red for long.

This project is a perfect no-sew kind of project. I took some of extra fabric I had lying around and decided to cover up my tomatos with it. This was very simple to do and it really doesn’t take long to finish. You don’t have to use just a tomato, you can also make your own pin cushions. With my project list getting longer and longer these days, I just decided to do the quick cover up. The supplies that I used were:
  • Hot Glue
  • Fabric
  • Pin cushion
I had a smaller tomato that I did the same thing to so that they would match. I also used the pins with the balls on the end to give it some bling since I can’t use them in my sewing projects anyway. Since I took the pictures for these a week ago, I have since added a button on top to finish my tomato off, as an added embellishment.

Happy Sewing!!!

Valentine Magnets


Valentine Magnets

Week 2 of the 5 Weeks of Love Challenge

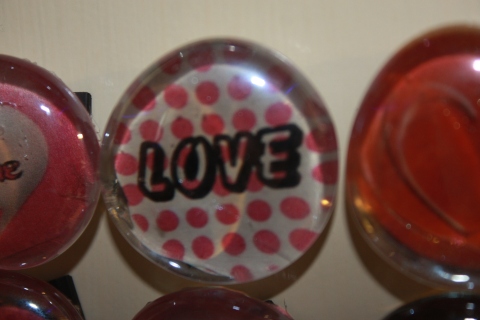
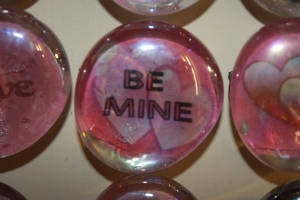
As we enter week 2 of the 5 Weeks of Love Challenge I wanted to add something that not only has to be used during Valentine’s day but they are cute enough to be left up for however long you like. I love magnets because I like to hang things for reminders, to hand our little ones art work, or just little love notes to the hubby. What better way to hang those cute little notes then with a magnet of love.
So there is an ever abundance of these bottle cap images going around and I never have those type of caps lying around here, I decided to try something with some of these images. This was actually a really fun paper project that can be easily made on your pc and printed on your printer. Once again I acquired some of these bottle cap images from Listia, I didn’t want to take the time of designing my own just yet, however I did just recently finish my first set. I was able to pick up these cute Valentines Day images for very few points and seeing how they were already made to size all I had to do was print them out.

The supplies I used were those 1 inch decorative clear stones (which I picked up at my local wal-mart for a little over $3.00 for a 3 lb bag), hot glue, your 1 inch images cut out, and a magnet strip. Make sure when picking out your magnets that you use a heavier duty magnet, seeing how the stones are a bit heavy. You don’t want them to drop every time you shut your refrigerator door. The process is actually quit easy, however because of the hot glue this isn’t a project I would let the kids work on by themselves.


The first thing you do is take your 1 inch circular image and place it on your workspace. Apply a decent amount of hot glue on top of the face of the image.

 Then take your stone and press it down over the image, making sure the hot glue has covered the entire image between the stone and the image. This will make for a clearer image.

The next step is to take your stone and flip it over and apply a decent amount of hot glue to the back, then securing the magnet onto the back of the image. Make sure when doing this last process that you make sure there are no big lumps that make the magnet stick out far on one side otherwise you will have an unstable stone that will most likely fall on one of your toes.

Really that is all there is to it. I decided to take some of my silver glitter nail polish and painted the backs of them just for a little extra bling.
Below are some other magnets that I did that are great gifts birthdays, holidays, or just because.
Happy Crafting!


Beaded Flower


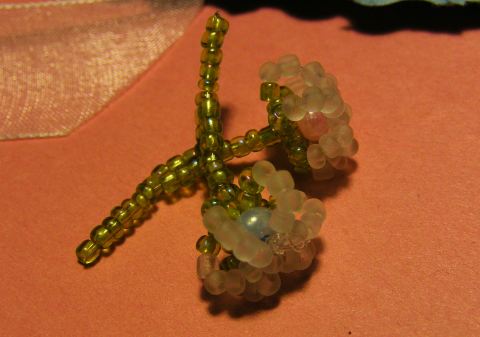
Recently I acquired a bunch of seed beads. For a couple of days I sat there sorting out the colors and just couldn’t decided what to do with them. After searching through some of my books I came across a beaded flower and tried it out for myself. I just wanted to show you the results. I thought it turned out pretty nicely. The little flowers are easy to make and they probably only take about 5-10 min a piece. They are small and can be used for many different types of crafting projects.
If you are interested in learning how to make these cute little embellishments leave a comment with your email address and I will send you a tutorial.


Happy Crafting

Valentines Day Charms


Valentines Day Charms

Week 1 of the 5 Weeks of Love Challenge


I have recently started working with beads again. It really started by me going through all my stuff after christmas this year and organizing it. I came across this huge bag of glass beads that I have collected over the years. I sat down and organized them by color and realized that I had some really cool looking beads. So as the ideas started rushing into my head the next thing I knew I had 5 Charms/Keychains done. After finishing them I sat back and realized they would make great gift topper or just a great side gift if you are giving a a lot of small items for valentine’s day. These would also make great valentine’s for your kids to give to their friends as they make great charms for backpacks and other accessories.
Small little trinkets like these are things that your loved ones can carry around all the time, to remind them that you were thinking about them and that you loved them. These are quick to make and they don’t cost a lot to make either. These are great projects for you and your children to work on together. There are plenty of pretty plastic beads for the younger children to be able to string together and wear.
The only supplies I used were a handful of glass and Tibetan silver beads, embroidery floss, clear bead string, and a plastic circle of some kind. I use the plastic reminder pieces for knitting/crocheting. I look forward to making some more of these in the future. I would like to make one for myself using Swarovski Crystal Elements. I think that would really sparkle.
Beading can be a very expensive hobby so its best to look on Craigslist, Garage sales, or even your auction sites like Ebay and Listia can have some great deals on bead lots. You don’t need a lot of beads to make something small and beautiful like this. Just enough to give it some color and class.
Valentine’s day doesn’t just have to be about the celebration of love between a couple. This can be a holiday about celebrating the love of everyone around you. Here are some other great charms or key chain ideas that you can make for your loved ones that celebrate the love of a life. As much as we know that Valentine’s Day is just one of those made up Hallmark type of Holidays why not take the time to tell all the people who you care about that you love and appreciate them. It never hurts to take the time to show someone you care or that you were thinking about them.

I hope you enjoy these as much as I enjoyed making them. I look forward to another great week. I am still looking into finding a blog for our Featured Friday spot. I do have a couple of blogs in mind I am just not sure on how to contact them to ask them permission to feature them on this site. Untill next time…..
Happy Crafting!

This was the bead project I worked on with my little guy and an idea for the younger kids to give as gifts or to make for themselves.

My First “Real” Sewing Project


What a great start to the new year. As I stated in an earlier post, I received my first sewing machine this year for christmas. I was so excited to use it that I went to our local Wal-mart the day after christmas and picked up some cheap material that had gone on clearance. After reading the manual from cover to cover, I took my material and started cutting and measuring. I did not have a pattern to go off so I just winged it. The same day I went and picked up my cheap Christmas Material from Wal-Mart I stopped by our local Joanne Fabrics and bought some clearance material for other projects. I wanted to use the material that I bought from Wal-mart to practice on, However what I thought was going to be just a practice piece ended up being something that I thought turned out pretty nice and I wanted to share.
The tote bag is reversible. I honestly did not think I would enjoy sewing as much as I did after working on this project. There is so much you can do and so much to learn. I am just soaking it all in. I have so many ideas and I can’t wait to make them. I am truly looking forward to being able to make my sons Halloween costumes in the future along with clothing items for myself since there are not many adult clothes in my size and shopping in the older children’s section does not help me look 30. The list goes on and on of gift ideas that I can make for my family for their birthdays and holidays. Now I just have to learn to read patterns, reasons for using different types of stitches, and some other things that I’m sure I will learn with more experience. I look forward to showing you more of my projects as they are finished.
If you have any advice or links on sewing for beginners please leave them in the comments section. I really would like to get into quilting and making clothes. Thank you to all my family and friends for all the support this past year and for all your encouragement for our future.
Happy Crafting during 2012 from my family to yours!

Friday Featured Friend #1


Amy Jo

with
Here is our FIRST EVER Featured Friday Friend. Amy Jo has some amazing talent when it comes to working with yarn. I have personally known Amy Jo for a few years now and this is a woman who is dedicated to her craft. With Valentine’s Day just around the corner this beautiful hat
Here are a few words that Amy Jo left us about what inspired her to make this gorgeous hat.
This is a hat that I made from a couple different colorways of Lionbrand’s Homespun yarn. I improvised the pattern. It is made for a friend of mine who has asked for one for years, finally got around to it and it only took one evening. (my bad…) One of my very simple pieces.
Currently I have many projects either on hooks or needles. I started crocheting my senior year of high school (now I’m 27) for the very same friend in fact, when I made her daughter a baby blanket. Talk about an ambitious first project.
My aunt taught me how to crochet. Then years later, I decided that I no longer wanted to be just a crocheter, I hopped on YouTube and taught myself to knit.

Here is a great resource that Amy Jo would like to share with everyone.

A great resource for both the beginner and expert alike is the site www.ravelry.com It is a community where yarnies can unite and share projects, find patterns (free and paid), and get the well deserved attention for what they have done! You can find me there and more of my projects at: http://www.ravelry.com/people/AmyJoPeters Hope to see you there!


I would like to give a big Thank-You to Amy Jo for sharing this wonderful creation.


If you are interested in becoming one of our Featured Friday Friends and share your latest creation, then please email us at friendsofsmalltowndreamz@gmail.com. Please include a couple clear photos of what you made along with a brief description about what inspired you to make it.
Thank you for stopping and make sure you stop by Amy Jo’s blog to see more of her fantastic work. http://dreameramyjo.wordpress.com.

Looking Forward.....

As I sit here and dust off the cobwebs to my tiny ghost town of a blog, I am excited to make a fresh start and slowly get back to what...