Showing posts with label Glue. Show all posts
Showing posts with label Glue. Show all posts
Monday, June 11, 2012
KiKi Love Creations: A Year of Scrapbooking! Introduction: Part 1 of 5
My Co-Writer for our crafting blog is doing a great scrapbook series over the next few weeks and if you are interested in joining her or just following along hope on over. She is just getting started so you have plenty of time to start if you are interested in joining along. Come check it out at KiKi Love Creations.
Sunday, March 25, 2012
Dressing up a Container
First I would like to say how sorry I am about the lateness of my posts these past few weeks. I was sick for a while there and then the hubby surprised me with a mini vaca to just get away for a couple days and relax. Wouldn't you know I left my laptop on the counter when we left and didn't realize it till 200 miles later. So I will be posting my projects the remainder of the week. I hope you enjoy.
My first project I dressed up a nestle quick container that stores my pens. This is a very fast and easy no sew project. I love containers, and I have containers to hold just about everything. Just recently I have started dressing up my containers so that they have a little more style.
I am also a big fan of pens and markers and have just about every color of sharpie and gel pen. Anyway so what I did for my pen container was take some plain white fabric, some brown ribbon, and some teal glitter. Ohh and some glue!
First I layed a line of glue down and placed the fabric right over the line.
Each time I rounded a side on the short sides I would lay a line of glue down to secure the fabric to the container
Then I wrapped the fabric around the container enough times so that you don't see any writing. If you are using a clear container you won't need as much fabric.
After I layed my fabric down then I glued down the brown ribbon.

 Next I glued the rim of the container then layed some glitter over it to just give it a little bling..
Last I labeled the container. I will eventually add some extra details as I come across them.
What do you do with your empty containers?
My first project I dressed up a nestle quick container that stores my pens. This is a very fast and easy no sew project. I love containers, and I have containers to hold just about everything. Just recently I have started dressing up my containers so that they have a little more style.
I am also a big fan of pens and markers and have just about every color of sharpie and gel pen. Anyway so what I did for my pen container was take some plain white fabric, some brown ribbon, and some teal glitter. Ohh and some glue!
First I layed a line of glue down and placed the fabric right over the line.
Each time I rounded a side on the short sides I would lay a line of glue down to secure the fabric to the container
Then I wrapped the fabric around the container enough times so that you don't see any writing. If you are using a clear container you won't need as much fabric.
After I layed my fabric down then I glued down the brown ribbon.

 Next I glued the rim of the container then layed some glitter over it to just give it a little bling..
Last I labeled the container. I will eventually add some extra details as I come across them.
What do you do with your empty containers?
Happy Crafting!
P.S. REMEMBER we have a Giveaway going on right now for a free fabric charm pack. Make sure you click on the link below to get the details on how to enter.Wednesday, February 29, 2012
Homemade Wooden Acrylic Stamp Pad
As I have said before I am new to stamping but I know that the acrylic stamps or as I call them "Clear Stamps" are fairly new to the stamping community. The stores are flooded with these more over the traditional rubber stamps. I like these because for a fairly cheap price you can get several different stamps off of one sheet.
I have to admit when I bought my first pack of clear stamps I was a little puzzled at how to stamp with all the stamps on one, however after one test run it didn't take me long to figure out that you are supposed to cut them to separate them. HA HA.
So now I have a baggie full of clear stamps. I do have a few traditional rubber stamps and after trying both I prefer the traditional wood block rubber stamp. I know they have those press blocks for the clear stamps, however I like to see things visually and somehow I feel more organized being able to lay out my stamps to see them.
So as I'm looking at a bag of my sons old wood blocks that he doesn't play with anymore it dawned on me to make my own Wood Stamps.
 This is actually very easy.
The first thing you want to do is take your clear stamp and fit it to the size block . this is very important so that your stamp is not larger then your wood block. However it can be the other way around. Your wood block most likely will be larger than your stamp.
Second you take your wood block and trace an outline of the block onto Card stock with a thin pen.

Next you will want to glue your card stock on to your wood block.
Then take the stamp that you are going to glue on to the wood block and stamp the piece of Card stock.
This way you will know what block is what.

Then wipe off the ink off your stamp to try and keep your hands and area clean.
Then take your glue and cover the flat side of your stamp and adhere it to the wood block.
Set a side to dry.
That's it!! You can color them in to make them stick out a little more. But really its very easy to make these wooden homemade stamps.

Make sure you click on our giveaway page to enter into our Stamp Week Giveaway Valued at $25.00.
Thursday, February 23, 2012
Tissue Paper Your Candles
This was a similar project to what Photo Jewels had done at the beginning of the week. I enjoy doing this with plain candles because then I can personalize them to my own liking. All I did for this was take a cheap plain white candle that I picked up at Wal-Mart took some plain red tissue paper that I had left over from Christmas and used my heat gun from my old painting days.
This was actually a candle that I had done for Valentines Day but with candle week coming up I waited to post till now. So this was really easy to do and pretty quick. I cut out a couple hearts from the red tissue paper. I cut them free-handed so there would be a slight difference between the candle.
After I cut out my hearts I took a couple drops of water and slightly dampened the back of the tissue paper so it would stick on to the candle until i could get the heat on it. After I positioned the heart on the candle I took my heat gun and on the lowest setting possible. I have a heavy duty heat gun which is a little more intense then the one i should have for this project. I learned that you should just quickly fan over over it slightly then pull away for a min so that the candle doesn't bubble up. Do this a few times until your tissue paper is fully covered by wax.
I think this makes for a great effect on decorating candles. You can use spice leaves for your kitchen candles. This is something I will do for Husband once his fresh spices grow in.
Another thing you can do to decorate your candles if you don't plan on burning them is to use glitter. If you are like me and love alot of sparkly and things that are a little on the blingy side this is a cute idea.
 Just recently I found a candle that had a really long wick on it and thought it was kinda nifty. This candle with out burning it has a strong aroma and so decided for the time being to keep it the way it is. I had found one of these bead pieces and tied it on their as to add just a touch of decoration. I think it looks nice.
 Remember tomorrow is the last day you can sign up for the Mystery Candle Giveaway. Click on the link below will take you to the giveaway page to get the details on how to enter.
Friday, February 17, 2012
Bead Bling!
Hi everyone! I wanted to share this craft with you. I did it a while
ago and made a set for myself as well as each of my children's
grandparents for their frig and everyone loved them!!
This is a quick fun craft that is great for a gift. Pictures can be used but also paper, designs, drawings.... there are so many possibilities!!
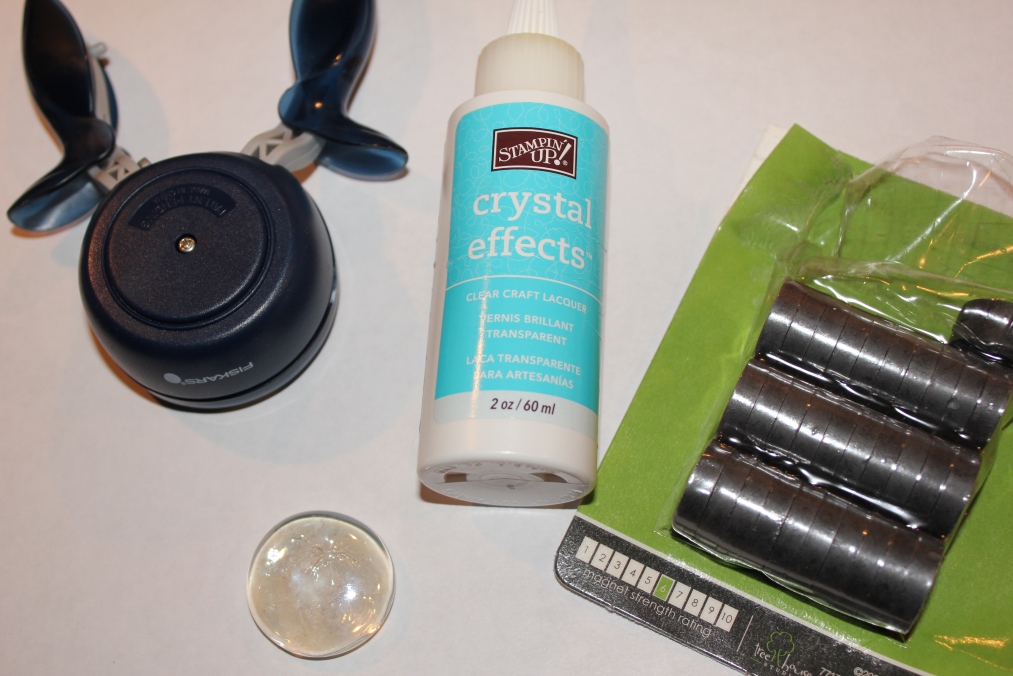
What you need...
Second, put a SMALL amount of Crystal Effects on FRONT of picture (or any other clear glue that you may find to work.)
Third, firmly press image on back side of clear bead and hold for several seconds. It's best to let it dry completely before next step.
Fourth, put a small amount of Crystal Effect on BACK side of picture.
Next, press magnet where you just placed glue and hold firmly for several second. Let dry overnight. (Keep checking bead as they may start to slip before glue is dry completely, you may have to recenter.)

This is a quick fun craft that is great for a gift. Pictures can be used but also paper, designs, drawings.... there are so many possibilities!!
What you need...
- 1 1/4 inch flat clear circular beads (I bought mine from Hobby Lobby in the wedding section.)
- any clear all purpose glue (Crystal Effects from Stampin' Up works great. The glue will make the picture more visible when it actually adheres to the gem.)
- 1 1/4 inch circular punch
- magnets (I used magnet 6 strength~ it was strong enough to hold paper on the a frig but is on the thicker side. You can also use cut sheets of magnetic paper but it won't be able to hold anything.)
- Pictures/paper/design or anything you want to show threw the bead
Second, put a SMALL amount of Crystal Effects on FRONT of picture (or any other clear glue that you may find to work.)
Third, firmly press image on back side of clear bead and hold for several seconds. It's best to let it dry completely before next step.
Fourth, put a small amount of Crystal Effect on BACK side of picture.
Next, press magnet where you just placed glue and hold firmly for several second. Let dry overnight. (Keep checking bead as they may start to slip before glue is dry completely, you may have to recenter.)
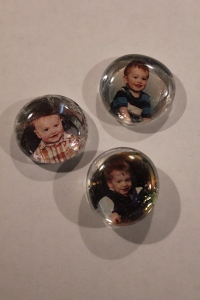
The picture below is what I made for myself and the kids' grandparents...
The
picture below is what I made in a stamping class the first time ever
doing this craft and it was actually just a small part of bigger
project... maybe one day I'll post the entire thing! The background is
just paper punched out!
Hope you enjoyed this!
Until next craft...

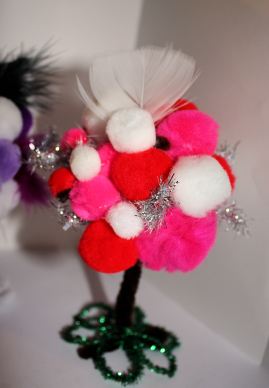
Pom-Pom Tree for Valentine’s Day
 Tree of Love
Fun Valentine’s Project for you and the kids
Week 4 of the 5 Weeks of Love Challenge

I saw an idea like this as I was searching for a something else and can not find where I saved the website name. So if by chance anyone knows who just recently did a tutorial for something like this let me know and I will be sure to put their name on here as an inspiration to how this project came to light. This was a lot of fun to work on with my little one. We played a counting game while we were holding the pom- poms on to set.
I wasn’t really sure how this was going to turn out but I wanted to give it a try anyway. I added the feathers for some extra flair and texture.
Honestly I think the hardest part was getting the support at the bottom just right to support the top.
The materials I used were
- Pom-Poms
- Chinelle Fuzzy Sticks
- Glue
- Feathers

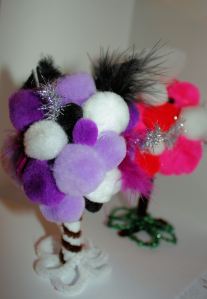
These look really cute in the window cill or the table as Valentine’s Day Decorations. I made a purple one for myself. I thought it was one of those things that would look nice on a shelf in my crafting area.

Happy February!!!

Subscribe to:
Posts (Atom)
Looking Forward.....
As I sit here and dust off the cobwebs to my tiny ghost town of a blog, I am excited to make a fresh start and slowly get back to what...

-
Welcome to Stash it Sunday Finally the warmer weather is starting to sink in up here in Wisconsin and that means we can finally open th...
-
It's Time!!! We are very happy to announce that we are launching our first giveaway here at Smalltown Dreamz. In celebration of our m...


